Privacy policy

I don’t collect any personal information. Please see google’s privacy policy regarding their cookies and information gathering.

My photo
Grand Rapids, Michigan, United States
Hello doll lovers! This blog was created to tell you about dolls I have made and classes I teach on doll making at Attic Window Quilt Shop in Comstock Park, Michigan (a suburb of Grand Rapids). My goal in teaching is to pass on the love of making heirloom quality dolls. Most of the dolls I make (and hold classes for) are designed by Gail Wilson - visit her website at www.gailwilsondesigns.com . Page down my blog for some fun doll links including antique doll sites and hard to find doll supplies.

Thursday, October 31, 2024

Check out Attic Window Quilt Shop's Fcebook page!

 Are you interested in seeing Attic Window's facebook page?

https://www.facebook.com/atticwindowquiltshop/


There is information about classes, pictures of new fabrics, etc.


Enjoy!  

Monday, March 1, 2021

Finishing

 Hello!  I hope this post finds you healthy and happy and safe in this now year old troublesome covid pandemic.   We have been taking care and being careful.  I have to say I’m rather glad to be finished with mask making.   What have you been up to? 

I’ve been getting some UFO projects finished.  And some orders from Etsy completed and mailed. And even one pincushion doll listed on my Etsy shop.  If you would like to go see it, here’s a link.

It’s the Pincushion Doll from Gail Wilson Designs.  

She was very much fun to make as are all Gail’s kits and patterns. 

If you would like to take a peak at Gail’s Website, it’s www.gailwilsondesigns.com. There are loads of fun patterns and things you might need to make your very own heirloom dolls.  Enjoy!  Thanks for visiting! 


Sunday, June 2, 2019

The New York Doll

Hello Dollmakers!
   
     Last Thursday at Attic Window Quilt Shop, we had our last class for Gail Wilson’s New York Doll. She’s the lovely primitive doll with the separate fingers. I figured out I could scan her hand pattern into my embroidery machine and Voila! It does all the hard sewing around those small fingers!

Although I’ll be taking the summer off to care for grandchildren, our dollmaking group will still gather on Thursdays at Attic Window Quilt Shop to finish up their NY Dolls.  The address is 5363 Alpine Ave NW, Comstock Park, MI. 49321.  If you need it, the phone number is 616-785-3357.

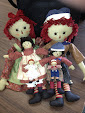
We have been talking about what doll we would like to do next in the fall.  Sounds like it will be Gail’s Raggedy Ann and Andy. I’ll be doing some of the tiny ones.

Have some doll fun today!

I didn’t see the tiny ones on Gail’s site, but here’s the link to one set. http://www.gailwilsondesigns.com/all_page_content/cloth_dolls_3.html

You can view Gail’s NYdoll pattern at: http://www.gailwilsondesigns.com/all_page_content/cloth_dolls.html

Here’s mine:

Here’s a close up of their fancy rings.


Here’s a short video of my sewing machine sewing the fingers for a student who wanted a black version:

Friday, March 29, 2019

Hello Again!

Well, Hello again, I apologize for my long absence!  Nothing but a senior moment hit me....I lost my password to my email account associated with this blog and it took until now to regain control of my account. It’s good to be back!

The Thursday group that meets at Attic Window Quilt Shop has been busy making dolls all the while my blog has been quiet. We have made the Topsy Turvey doll, Mammy from the historical series, Hitty, Pinocchio, Mother Goose, Little Bo Peep, Humpty Dumpty, and many more.  Ok, true confession, not all of these actually got finished!

Currently three of us are making feedsack dolls and next up will be a repeat of the New York Doll (in May). We made this doll awhile ago, but a few of us would like to make it again. She has lovely fingers. The pattern piece for her hand I scanned into my embroidery sewing machine and let the embroidery module sew it. Perfect fingers every time. I have since traded that machine in. Hopefully the new machine does it just as nice.

You can view some of these dolls at Attic Window Quilt Shop in Comstock Park, Mi or here at Gail’s website: www.GailWilsonDesigns.com

Here’s my Mammy. I had her listed in my Etsy Shop, but was unlisted due to her sensitive nature. I had better luck with my topsy turvey doll.  And yes, that is my nosey kitty in the picture!


Since we have open bee group when we aren’t having an official doll class, we have a few quilters who join us on Thursdays.  You should see some of the amazing things they make!

It’s so nice to be back! 

Wednesday, October 7, 2015

Please Pardon Me


Oh my!  Soooooo long since my last post.  So sorry about that!  We had stuff happen, like new grandbabies, kitchen remodel, international travel to celebrate 40 years of wedded bliss, etc!  Time sure flies past fast when you are having fun....and grandbabies.

What's been happening doll wise?  Our regular Thursday doll making group that meets at Attic Window Quilt Shop in Comstock Park, MI. has been having lots of fun making all sorts of things.  We made some zipper compartment bags to hold lots of nice little doll making tools, a classmate tote with vinyl pouches, and some quilts. Yes, we took a little break over the summer for non doll things.

A few of us that had  Little Red Riding Hood kits from Gail Wilson just finished or in my case almost finished making them.  Very Cute. Big Bad (wolf) is exceptionally handsome. But don't stand too close; he licks.

To visit Gail Wilson's website to see Little Red, click here and go to oldies but still goodies and page down to "in case you are looking".  There is a link to click on to see the picture of Little Red and Big Bad.

In October, we plan on making a hedgehog and maybe a teddy bear.  Teddy will be made, just not sure if it's going to be soon or next year.  So if you have nothing better to do, stop by and see what's going on at Attic Window Quilt Shop.  We are an open group bee on Thursday and although we usually do doll things, we have several folks that come and bring non doll things to work on.  The fee for all the Thursdays in the month is $5.00 for class room use. We hope to see you there.

On the first two Thursdays in November, I will offer Gail Wilson's Mini Snowman class.  The pattern is $9.50 and the class is just the bee fee of $5.00.  And yes, you get to come every Thursday in November if you want. Think of how many snowmen you could make!   The class is offered Nov 5 and/or Nov 12, 2015.  Please sign up a few weeks ahead of time, so we have time to get the patterns.

To view Attic Window Quilt Shop's blogspot with a class calendar, click here

To shop at Gail Wilson's Doll making supplies and kit site, click here and be prepared to think Christmas!

Have some fun today!  And thanks for stopping by - Julie


Wednesday, March 26, 2014

Eternal Winter.  Oh, I am tired of the snow, cold and wind.  Come on already Spring!

ok, now that I have that off my chest.....here are some pictures of what I have been doing while shut inside during winter.

At the end of  2013, I taught a class for Gail Wilson's Raggedy Ann and Andy in all three sizes.  I think Shirley set a record for how many she made. It all started out with one for a grand child.  Then the others got wind of it and they all wanted one!  Poor Shirley was making RAs for months. The picture on the left are the larger size. They usually have brown hair, but I got a custom order for red. After class, off they went to their new owners, a brother and sister both with red hair.  All three sizes are below. A very nice doll to make.
Here's a link to Gail's cloth doll patterns and kits: GW cloth dolls

 
                                                                                                     Very recently, I got a new grand baby girl. She is a sweetie. I made her some crib sheets.  Chris, the owner of Attic Window Quilt Shop in Comstock  Park showed me an easy and economical method of making them.  I made a few in the flannel from Attic Window,  which  is very deluxe - so soft and of high quality . This sheet would be a good first sewing project for some one wanting to learn the basics. Attic Window is where we doll makers meet once a week for some doll making fun.  Stop in and get your very own impromptu crib sheet lesson!  The baby quilt is "Reveille" from Carrie Nelson's book "Another Bite of Schnibbles".  There are several more patterns in that book that are on my bucket list.
I cyber bumped into a wonderful online e-pattern place for making clothing for the grand kids.  Peek A Boo patterns are wonderful.  You purchase the pattern, it comes to you via a PDF file and you print it out and tape it together. Works like a charm for those of us who get that bug to sew after the shops are closed  and we find we don't have a pattern in the correct size.  Good thing I have a stash of fabric on hand!  I love these patterns because you buy them once, store them in digital form, and when you need it you print it out.  All the sizes are included, from baby to teen.  I made yoga pants in size 7, 5, and next up is 2T. I know I am going to be making these often, so I keep the print outs in a notebook. They are easy patterns to make. And the kids like them.

 After the red pincushion doll sold, (funny story there) I got a request for another. So this one in a colonial style with a faux grained stand had to wait to be finished.  She got finished, listed and sold on Etsy. 

hmm what else have I been doing???  Oh, we are in the middle of the Molded Head Izannah class at Attic Window.  We have the body parts made and in the painting process now.  Hair takes a few coats to get the nice dimension we want and we are taking our time.  Here's my finished version from a few years ago. I have since changed her into a new dress.  I have two in the works now, one to be a girl and one a boy. 


What are we up to next at Attic Window?  We are going to finish the Molded head Izannah and then move on to Hitty.  We all have several of the Hitty club items we will work on.  What are you up to? 
Have some doll fun this month,  thanks for stopping by - Julie


Pincushion Doll

Hello dollmakers!  You have probably been wondering what I have been up to!  New grand babies!  I have been busy.  So busy I forgot to publish this draft from a year ago!  So here it is, even though so out dated.  The Pincushion doll in reds sold on Etsy quite awhile ago.  And my sewing room is quite messy again.  sigh..... At least it's Spring right around the corner. It ends quite abruptly; I guess I was planning on going back to add more.  Here it is, and I promise I will post again soon so you can see what dolls I have been working on.

Hello dollmakers! 

Happy Spring to you!  We have spring flowers starting to make their way thru the snow and hard soil.  It won't be long and we will see the bright yellows of Narcissus and Forsythia flowers.  Spring inspired me to straighten up the sewing room and now you can see all the UFO dolls waiting to be finished.  Two black hitties and the Portrait Izannah are the two lucky ones up next.  Izannah  just needs some antiquing and clothing and she is finished.


Today I am finishing up another Pincushion Doll from Gail Wilson Designs.  She is outfitted in reds this time.  The pincushion doll can be found here.  She is available in a kit (brown or blue clothing) or as a mini kit (you supply your own clothing fabrics).  I can't tell you how much I enjoying my Pincushion Doll on my sewing table.  She holds my doll making tools, pins, needles, and many other things to keep them from getting lost on the sewing table. 
 Next week is the last class for this doll at Attic Window Quilt Shop in Comstock Park, MI.  There will be a few other dolls in their final stages that the other participants have made.  All are so cute!

To finish my doll, I need to sew her bodice.  After sewing the shoulders, adding lace, and sewing the side seams, I like to press open the seam allowances.  This is easily accomplished using the wooden handle of my stuffing fork or the handle of a wooden spoon. I keep several sizes of wooden spoons and other utensils (spurtles, etc.) just for ironing tiny sleeves.


Saturday, February 9, 2013

My Husband's Dolls

Yes, my husband has some of my dolls.  Once in awhile, he asks to own one of them. I like that he likes the dolls that I make.  Of course, they are sweet - all due to the excellent design of Gail Wilson.  Here are pictures of the dolls my husband has taken to work with him.  They permanently reside on his office bookshelf.   I will include links to Gail's and other websites, so you may see the info about purchasing your own kit, pattern, or finished doll or other items.  click here  for her home page.

 
Here is Lottie Click here , who I missed awhile ago and wondered where she was!  I thought maybe she had gone wandering with a kitty, but here she is safe and sound.  Guess I forgot she went to live at Baker Publishing Groups home office. Lottie was featured in 'Homespun' Magazine of  Austrailia.                             We made Lottie a few years back at a class at Attic Window Quilt Shop in Comstock Park, MI.  We meet there every Thursday, weather permitting for doll making fun.  We are currently working on the Portrait Izannah Walker doll. 
 
 Little Red Riding Riding Hood and Big Bad Wolf have
become fast friends after sharing a nice lunch from Red's shaker style wooden lunch box.  There's nothing like a good meal when you are hungry to take away that desire to eat little girls, right BBW?                       LRRH and BBW are now retired. 
 By their feet is my first Noah's ark - one of Gail's early versions of this tiny treasure.  It has a little  fence around Noah's ark - all hand painted be me many years ago.  There are several little pairs of animals near the fence and even a pair of doves on the roof of the ark.  There is another version of Noah's Ark available on Gail's website in the tiny dolls section. Click here and page down a bit.


Hitty click here has her very own rocker from Anne Giblin.  My Hitty at home has one too, they are very sweet rockers.  Hitty holds her very own small copy of her book "Hitty, Her First One Hundred Years" by Rachel Field.  This book is from Papermini.com  click here
 Sign up for the free newsletter and get a link once a month free projects to print and make.  The link you will get has another link to past projects. There are some Holiday items that are especially cute: Valentines, Candy Boxes, The Paas Easter egg kit and the Pink Peeps.  The items are available in different scales including American Girl size.  Be sure to read the tutorial and paper type recommendations.  Some items require card stock or other heavier weight paper.

The Hitty book was a Paperminis past project and is not available free, but you can purchase the book to make or already made up.  The little bears are nearby on their own settee. I suppose since it is almost valentine's day, they might be whispering sweet nothings to each other.  You can find the small bears here: click here. 

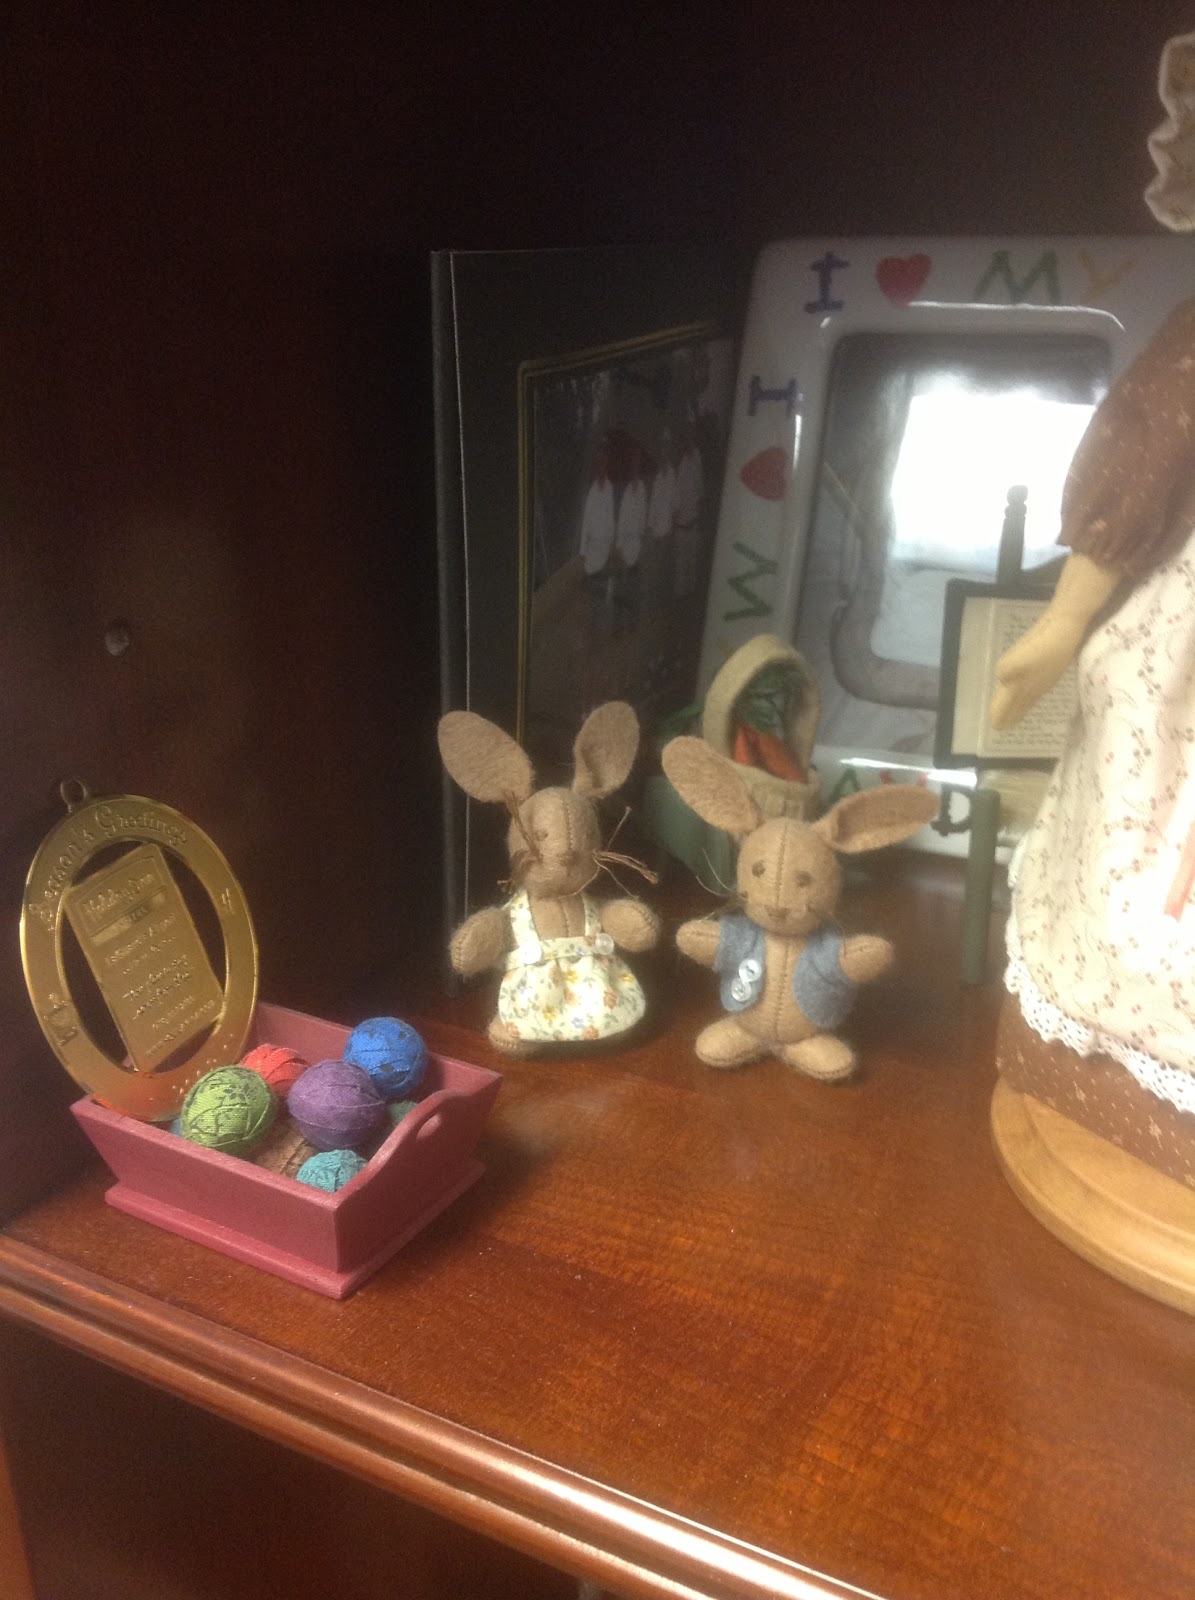
And last and probably least in size are the little bunnies.  They have their own wheel barrow with some carrots in it.  They are no longer available in the tiny size, but they are available in a larger size.  click here and page down to bottom

I hope you enjoyed the trip to my husband's office.  I did because I found a doll that I thought I had lost! 

Thanks for visiting, and be sure to check Attic Window Quilt Shop's class list for classes including doll making classes click here and look for class list icon

Starting in March, we will be making the Pincushion doll.   click here
Call the shop for details  or to sign up.  616-785-3357
Have some doll fun today! - Julie


Sunday, December 9, 2012

Happy Holidays

Hi dollmakers!  Happy Holidays to you and yours.  I hope this holiday season finds you enjoying the season.  Things have been hopping around here!  This fall we held week long doll bees to finish some of the dolls we had been working on during the year.    We all had multiple versions of Gail Wilson's Columbian doll in the works.  Some were the large ones, and several of the smaller versions.  I still have three in the gesso stage, waiting for paint paint and then clothing.  I was hoping to have them finished and posted in my Etsy shop in time for Christmas....maybe I can make my own home bee and get them finished this week. There are a few black Hitties that are waiting facial details, stuffing, and clothing too.  I think I know what my new year's resolution is going to be!

The original antique Columbian doll resides at the Wenham Museum near Boston, MA.  You can read her story here: http://www.wenhammuseum.org/misscol.html

Gail Wilson's versions of the Columbian (available in kit form for the larger 14" doll and pattern for the 11" doll) doll are available here: http://www.gailwilsondesigns.com/catalog/historic_primitive_2.html
(page down a bit to see the Columbians)


Here are some of the  Columbians made by  Barb this year. She has some of her other dolls in her Etsy store.
 http://www.etsy.com/shop/BarbsBackRoom


I also took some time to develop a chicken pincushion pattern that uses 3 blocks.  You can use orphan blocks if you wish.  The pattern walks you thru how to make a small pincushion with a log cabin  block.  The patterns are available in my etsy shop: http://www.etsy.com/shop/Julsie1231

 
Next year, the doll classes scheduled at Attic Window are the portrait style woven cloth Izannah Walker doll (Thursdays in Jan. and Feb. 2013)  and the Pincushion doll (Thursdays in March and April 2013).  If you have already taken the pincushion doll class at Attic Window with me, you can retake it for a reduced bee fee of $5.00 for the whole month of Thursdays.  (we usually meet every Thursday).
Come and join us - we have so much fun!

Tuesday, September 4, 2012

Two Black Hitties

Hello Dollmakers! This morning, while I was having my coffee,  I think I heard a collective sigh of relief from all those parents whose children have gone back to school today.  In celebration, I started two black versions of Gail Wilson's Hitty doll.  To see more of this Hitty and all her accoutrements, please visit Gail's website: http://www.gailwilsondesigns.com/catalog/hitty.html
 
Before I begin painting, I always clean up my work table so the mess doesn't migrate to other things setting nearby. I put down a clean sheet of freezer paper to protect the table and figure out where you will put the wet paint items to dry.  I learned the hard way that this is an important step -  and to do it ahead of when you start painting  so that you are not looking for somewhere to hang the wet part while you are holding it.  It's even harder  to set up a spot while you are holding the wet piece.  So lesson learned, I get it ready ahead of time.  I have a nice block of styrofoam and some tooth picks waiting nearby. I also get out my good light and some reader glasses to magnify what I am seeing.  All these items are like "insurance" - to  help me do a good job.
 
Gail has nice skin colors of paint, and  since I have Etsy folks asking for black Hitties, black skin paint it is.  I have a nice newer-ish  larger paint brush and some rags and water all set (keep the paint covered until you start to paint as it dries out).
 
 
First and formost, we take a good look at the paper mache heads and limbs and fix any blemishes that need fixing.  The ones I have here are pretty clean and only a few finger prints need to be wiped away. I do this by wetting a 6x6" square of t-shirt with water and rubbing the part.  If there are things that need fixing, you can use paperclay, a bit of flumo dripped over the flaw, or wood filler.  Sand paper can be used to sand away any extra mold marks that bother you.
 
Once they are wiped, they dry pretty fast and I can apply the skin paint.  Keeping your brush clean, work your way around the head going into the hair area.  Should I paint in the holes or not?   The instructions in the Hitty kit are wonderful;  no questions as to where to paint.  There are tips to help you do a great job.  I don't feel I have any special gifts in the doll making arena, I'm just a regular Jane, but when I follow Gail's instructions, I always end up with an heirloom quality doll.  Once you have gone around once with one coat, check for any missed spots which will show up white.  If you see very thin "see thru" areas, you can paint over them once you have gone around once.  After you think you are finished, do a final check to ensure you got every where with your first coat.  Don't worry too much if it isn't perfectly even, it will be after the second coat is applied. 
 
 Here is the first coat applied to the heads including where the hair will get painted black later.   One thing to mention - weight distribution is important. You don't want your block to tip over with one wet head on it, so be sure to place your heads in a spot that will not cause the block to tip.  Or if it is hollow underneath, you can place the styrofoam over a heavy object that will hold it in place.
Add caption
 
After these are good and dry, they will get a second coat.  I like to pull off all the parts from the styrofoam block so I don't knock into the other pieces when I try and put the wet parts back on the foam. It also helps you know what piece is painted again so you don't miss any. 
 
After the second coat dries, I switch over to alkyd oil paints because it is easier for me to get a good result with them.  I struggle with acrylics because they dry so fast and I am not an expert painter. Oil paints take longer to dry which means I have longer to fix my boo-boos. Alkyd oils take less time than regular oils, so they are a good fit for me.  
 
Put away all the water based paint things so you don't get confused and use water instead of turpintine. (yeah, it happens, so this is why I take the steps to insure I get it right).
And you need some ventilation for oil paints, so the fan comes out and a window gets opened even though the a/c is on. Just a couple of inches at the top to pull out the fumes. I use such small amounts of paint and turp, the fumes are hardly noticable, but I like to follow the safety rules.  
 
I also like to have a couple of different brushes: a fine 18/0 spotter for going around the edges of the hairline and for the face details, a small filbert 20/0 for an eraser brush, and a #2 filbert  for filling in the hair.  In addition, I have a small palette, a small stack of 6x6" rag squares for cleaning my brushes while I am painting and a small jar for a teaspoon of turpinoid.  Yes, that is all the turpinoid I need because I clean off my brushes by swiping them on a rag until all the paint comes off and then I dip into the turp and swipe again on the rag.  No swishing a very dirty brush in the turp....it just makes a bigger mess.  Keep the paint on the rags, using the turp only when you can't get any more paint off the brush onto the rags. Also dip just the tip of the brush in the turp and it will suck up some turp without getting paint into the jar of turp.    
If you would like to have a good set of instructions of working with oil paints for dolls, Gail's Emma and Charlotte doll kits or patterns are an excellent choice.  These dolls are painted with alkyd oils and the instructions cover what colors you will need for doll faces, how to mix the skin and other colors, how to shade faces for depth, brush care, and much more.  I made the jump to oils several years ago and still love the way I can get a super doll face with less struggle.
 
I paint the hair with ivory black paint starting with the outline of the hair using the 18/0 spotter.  Just a small amount of paint is all you need.  Keep your brush clean clean clean, and it will perform better.  When you feel the paint is not flowing off your brush as well, then time to clean it by swiping it on the rags and then getting some turp and swiping again. A clean brush is your friend when it comes to painting small.  Also, use very little paint on the very tip of the brush.  Oil paint is easy to slide around - oh so much easier than acrylic.
 
 If you go a bit outside the mold mark for the hair, take your 20/0 filbert, dip it in the turpinoid and dry it off as well as you can by squeezing it inside a small rag. Then use this brush to PUSH the stray paint back into the outline.   Wipe the brush  clean and push some more if you need to.  Always clean your eraser brush before you put it down. Then if you push too far into the outline, you can always take your paint brush (put the eraser brush down, and use it only for erasing) and add more paint in again.  I try and keep the hair paint just a hair (pun intented) inside the hair line.   Sometimes it's easier to hold the head upside down to get a good angle. 
 
It's important that you check yourself now and then for paint on your fingers so you don't get it onto her face or neck area.  I keep a rag with some turp on it for just in case I get it on me and I can wipe it off easy without gettting it on other things.
 
For the back, where there isn't a mold line to follow, the #2 filbert brush comes in handy
for the scallops.  The natural shape of the filbert is the perfect shape for the scallop hairline. Or you can just free hand paint in the scallops with the 18/2 spotter brush.  


Once the outline is complete, you can use any larger brush and paint in the rest of the hair.  If you wish, use the tiny spotter, very cleaned of paint and just a touch of turp wiped off, and pull off paint at the center top of her head for a 1/4" or less to make it look like a part.
 
When you are all finished, do a check to ensure you don't have any unpainted areas.  Here they are all skin and first coat of hair painted.  Now they are ready to be "put up" out of danger of getting bumped.
 
Here's a good spot, up on a shelf with all the UFO dolls.....no body is going over there for awhile.   Oh, the Joel Ellis is just getting a spot of repair done, she doesn't really belong with the UFO's either.
 
While these dry for a few days (the downside to oils is that they take time to dry -  regular oils take a week, alkyd oils dry to a tacky feel in  24 hours and well enough to paint eye whites in 2 days) we'll sew the bodies.
 
I hope you had doll fun today and thanks for visiting - Julie
 
PS - Gail has a new face painting service available, so for those of you who want one can get a painted face in your doll kits. 


Wednesday, August 1, 2012

Black NY doll

Hello Dollmakers, Happy first day of August to you.  Gee, the summer is flying away and I have not yet finished my goal of listing 3 new dolls on my Etsy site.  It seems that the dolls that were there have found new homes and my shop shelves are bare.   
I guess that means I beat the heat and stay in and finish my Gail Wilson New York Doll - the black version.  She has locks of springy black cotton chenille hair and an embroidered face.  I'm wondering if I need to redo the irises in a darker brown color, which is very easy to do.....what's your two cents worth on the subject?

She has separate fingers with a simple ring.  My goal for the day is to make her shoes; everything else is finished - her red red dress of vintage fabric (Thanks Lisa of Stray Threads for the vintage fabric  http://quilltr.blogspot.com/), her simple slip with a fringe hem, the pantaloons,  her brown socks - it's all finished except to sew her together, dress her, and put on her shoes.  I need to get the fuzz off from making her hair - lots of little pieces of yarn sticking to her.


In case you are interested in the white version, I have one sitting on my chest of drawers and can share some pictures.  This one was made during a Gail Wilson online class years ago.  I have made quite a few of the NY dolls.

I sanded down her fingers to make her look old, but won't do this on the black version as the stuffing shows through too light.


You can see information about Gail Wilson's New York Doll at:

To visit Etsy:  www.Etsy.com    my shop is Julsie1231

Thanks for stopping by - Julie
ps - next up in my workroom are two black Hitties


Sunday, June 17, 2012

Meet Baby Samantha

Hi Dollmakers!  I have been busy enjoying my newest  grandbaby, Samantha!  She arrived March 21, 2012.  She is a cute little redhead and is so sweet. She is starting to smile now.  I enjoy babysitting her every Monday thru Wednesday. 

What else have I been up to?  I have been checking in at the New Inspirations of Art Studio on 28th Street in Cascade.  http://www.inspirationsofartstudio.com/
This a a cool place to come and have some fun!  Or just get away to play, create, meet other crafty people, or try your hand at a new thing.  Next time you have some dry cleaning to drop off (yes, there is a terrific dry cleaning spot right next door), check into the art studio.

Oh - just remembered - they have asked me to teach the Penny Rug Santa class at Inspirations of Art Studio. So for those of you who wanted to make PRSanta and missed it last time, here is your chance.  The class starts July 27, but please sign up 2-3 weeks in advance so that we have time to get your kit.  If you already have a kit, no worry to sign up in advance. 

At Attic Window, we are just bee-ing for the summer.  Any one is welcome, bring anything (doll or other project) you wish to work on.  The fee is $5.00 for the whole month of Thursdays.

Starting the first week in September, we will be holding class for Gail Wilson's 14" portrait Izannah Doll .   This is the one that is all cloth (no stockinette) and is painted in oils.  Classes for this doll will be the first and third Thursdays of September and October.  Later in the year we hope to make the cotton ornament dolls. View the kit information for these dolls on Gail's website: www.GailWilsonDesigns.com
PRS is in the Christmas section
Portrait Izannah and cotton ornaments are in the new section.

Have a great summer vacation and have some doll fun!  Thanks for stopping by - Julie


Tuesday, March 13, 2012

Use Your Feet For Doll Clothes  

Hello Dollmakers!  Today I'll be getting out my special feet.... but not the ones at the end of my legs that always have sock monkey socks on them.  When I make doll clothes, I switch back and forth between 2-3 different feet, and  I like to use my special hemstitching foot for sewing and finishing seams in one pass.  This special foot has a bar across it that makes the zig zag portion of the stitch perfect every time.  I use it also to just zig zag around the edges if I want a flat seam I can open.


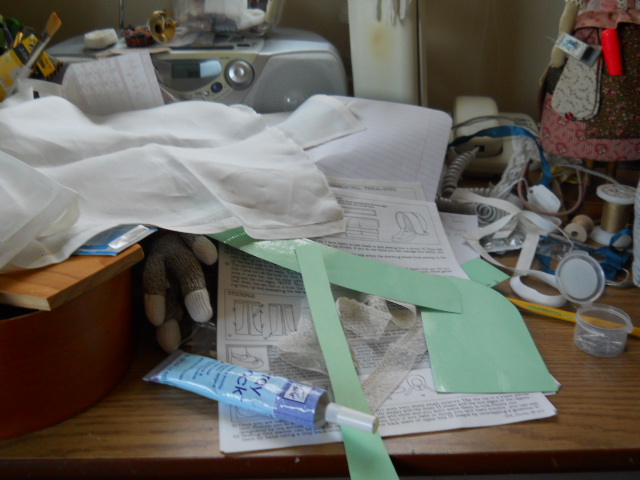
But before I begin, I have to clear my sewing table, it's a BIG MESS!  And then find the material I want to use and gather the pattern pieces I will need.  I like to keep my Gail Wilson doll patterns in notebooks and I slide the laminated pattern pieces in a sheet protector and keep those in the notebook too.  If I use ivory colored cardstock for body parts and another color for the clothing patterns, I can zoom right to what I need.  Gail's instructions are wonderfully detailed so you never wonder about what to do.  For more information about Gail's dolls, visit her website at: www.GailWilsonDesigns.com


Miss Columbian has found a new owner and she needs to have her bonnet and pantaloons finished right away for her journey to Texas.
So let's cover how to apply lace to a bonnet brim and how to make tucks for the pantaloons and how to finish the seams on the pantaloons with the hemstitch foot.  
After I have picked out the linen and lace, I cut two brims and gather my lace.  My rule of thumb for how full to make the gathers is:
1.5 times the length of the item you will gather it to (the brim) for soft gathers,
2 times for average fullness (this is the one I use the most),
3 times for a very full fluffiness of lace.

Set your stitch length to long (4.0 for me) and at the edge of the lace that will be hidden in a seam, sew your gathering stitich leaving 4 inch thread tails at each end to pull up the gathers.

Find the center lenthwise of the lace and the brim piece and pin to one brim piece with outside edge of lace heading in.  Pin two outside edges too. 


After the mid and end points are firmly pinned, pull up on the bobbin thread until the lace fits the size of the piece you are sewing it to. Use a stilletto to evenly distribute the lace gathers.  Pin as you go.  Secure the end threads so they won't let the lace fall off (I wrap around the last pin.)

Reset your machine stitch length back to the regular length (I like 1.6 or 1.8 for little doll clothes, the scale of the stitches seems more suitable) and sew the lace to the brim piece using a stilletto to re-arrange the lace when it gets out of whack. Watch close that you don't let the edge sneak out of getting sewn down.

After sewing, check that it's all sewn good and then following Gail's instructions, apply the other brim piece to the first one sandwiching the lace inbetween and sew using the sewing line from sewing the lace on the first brim piece as a guide.  Clip around the curves and turn outside right and press.  For the remaining instructions of how to attach the brim to the bonnet for the Columbian doll, please see the instructions in Gail's kit available at http://www.gailwilsondesigns.com/all_page_content/historic_primitive2_ins.html
The pantaloons require a bit of preparing - you need to make some tucks on the fabric that will then be folded and lined up with the bottom of the pattern piece.  Precut the rectangle sized for the doll you are making (the Columbian doll comes in two sizes) and iron up the two folds where the tucks will be.  I get out my special foot that has the bar so that I can line up the edge of the fold with the bar so I know I will have a 1/8' tuck. 
 Here's the first tuck going in.


And the second Tuck going in; if you look close you can see the fold up against the bar.

Both tucks are in and in need an iron.  I can see I still need practice.  Sewing tucks on linen is hard for me.  I do much better with batiste.

Then fold up the amount listed in the instuctions for the hem portion. Iron, but do not sew yet.  Or you can leave it unfolded, but adjust the placement of the pattern to allow for the hem that should have been folded up. 
Now fold the fabric in half, wrong sides together, then take each side and fold in half again so that you have two folds with the tucks inside.  Be sure the folds line up nice and that the tucks match exactly. I pin at the tucks so they stay lined up while I trace the pattern.


Lay the pattern piece on the fabric, the one side up against the two folds and trace around the pattern. Pin in a few spots,  and watching out for your pins, cut out the pantaloons and zig zag around the raw edges if you wish.  I usually zig zag around the waist edge with my hemstitch foot. Then using that foot and adjusting to a special stitch on my machine that sews a straight seam and a zig zag at the same time, I sew the crotch seams. 

 Then flip the pantaloons around so the leg seams can be sewn, and pin, matching the seams from the crotch.  Sew the leg seam in one swoop. 

Turn up the bottom leg hems and turn down the waist hem, pin and iron.   It's hard to iron little doll clothes with a big iron and board, so I get out my little flat wooden utensil (spurtle?) and my little clover iron and give it a good press.  A wooden spoon handle works too, but the flat one is really nice for little pant legs and sleeves.  Then I hem the legs by hand  and put in a drawstring at the waist.  I make my pantaloons a bit differently than what's in the instructions.  All those years of making baby clothes, I guess....I just make the doll pants the same way as people pants.

I hope you enjoyed watching these doll clothing items going together.  Thanks for stopping by and I had fun today!  - Julie


Gail Wilson dolls I have made

My Blog List